Most seasoned boaters have mastered a few simple knots which can be easily tied and untied when needed. The three essential knots most commonly used on power boats are the cleat knot, the bowline and the clove hitch. Are you nervous because you don’t know how to tie your lines? No need to stress as these three knots are straightforward, quick to learn and we will explain the how-to part in just a moment. It’s up to you to do the practice part.
One more vital but sometimes forgotten tip is this: never throw a line that isn’t tied to the boat first. I hear a few of you laughing as you recall a time or two when your mate forgot this fundamental guideline.
Cleat Knot
The most common use of a cleat knot is for docking. It’s an amazingly easy way to secure your boat to both a fixed and floating dock. Cleats come in many different sizes and materials but the knot should look the same no matter what. In fact, if your cleat knot isn’t pretty then it isn’t right. It should look as if two rivers are running parallel under a bridge. But if your cleat looks as if a pretzel is perched upon it then that is not a cleat knot.
Take a full turn around the base of the cleat then begin to make a figure eight across the horns of the cleat. First, loop across the top of the cleat to go around and under one horn. Continuing in the same direction to finish the figure eight but before you turn the second horn, twist the line to form an underhand loop that will slip over the second horn. The line will now lay with two parallel rivers under the overhand bridge. If you twist the underhand loop in the wrong direction you make a pretzel. Just untwist and retwist in the opposite direction and voila! The perfect cleat knot.
Look at this photo of a correctly tied cleat knot, watch our video above and practice a few times. When you are certain you have this knot mastered then take a stroll down the dock of any marina. Wow! It is truly a wonder how many different configurations try to pass off as a cleat knot. But now you know the right way.
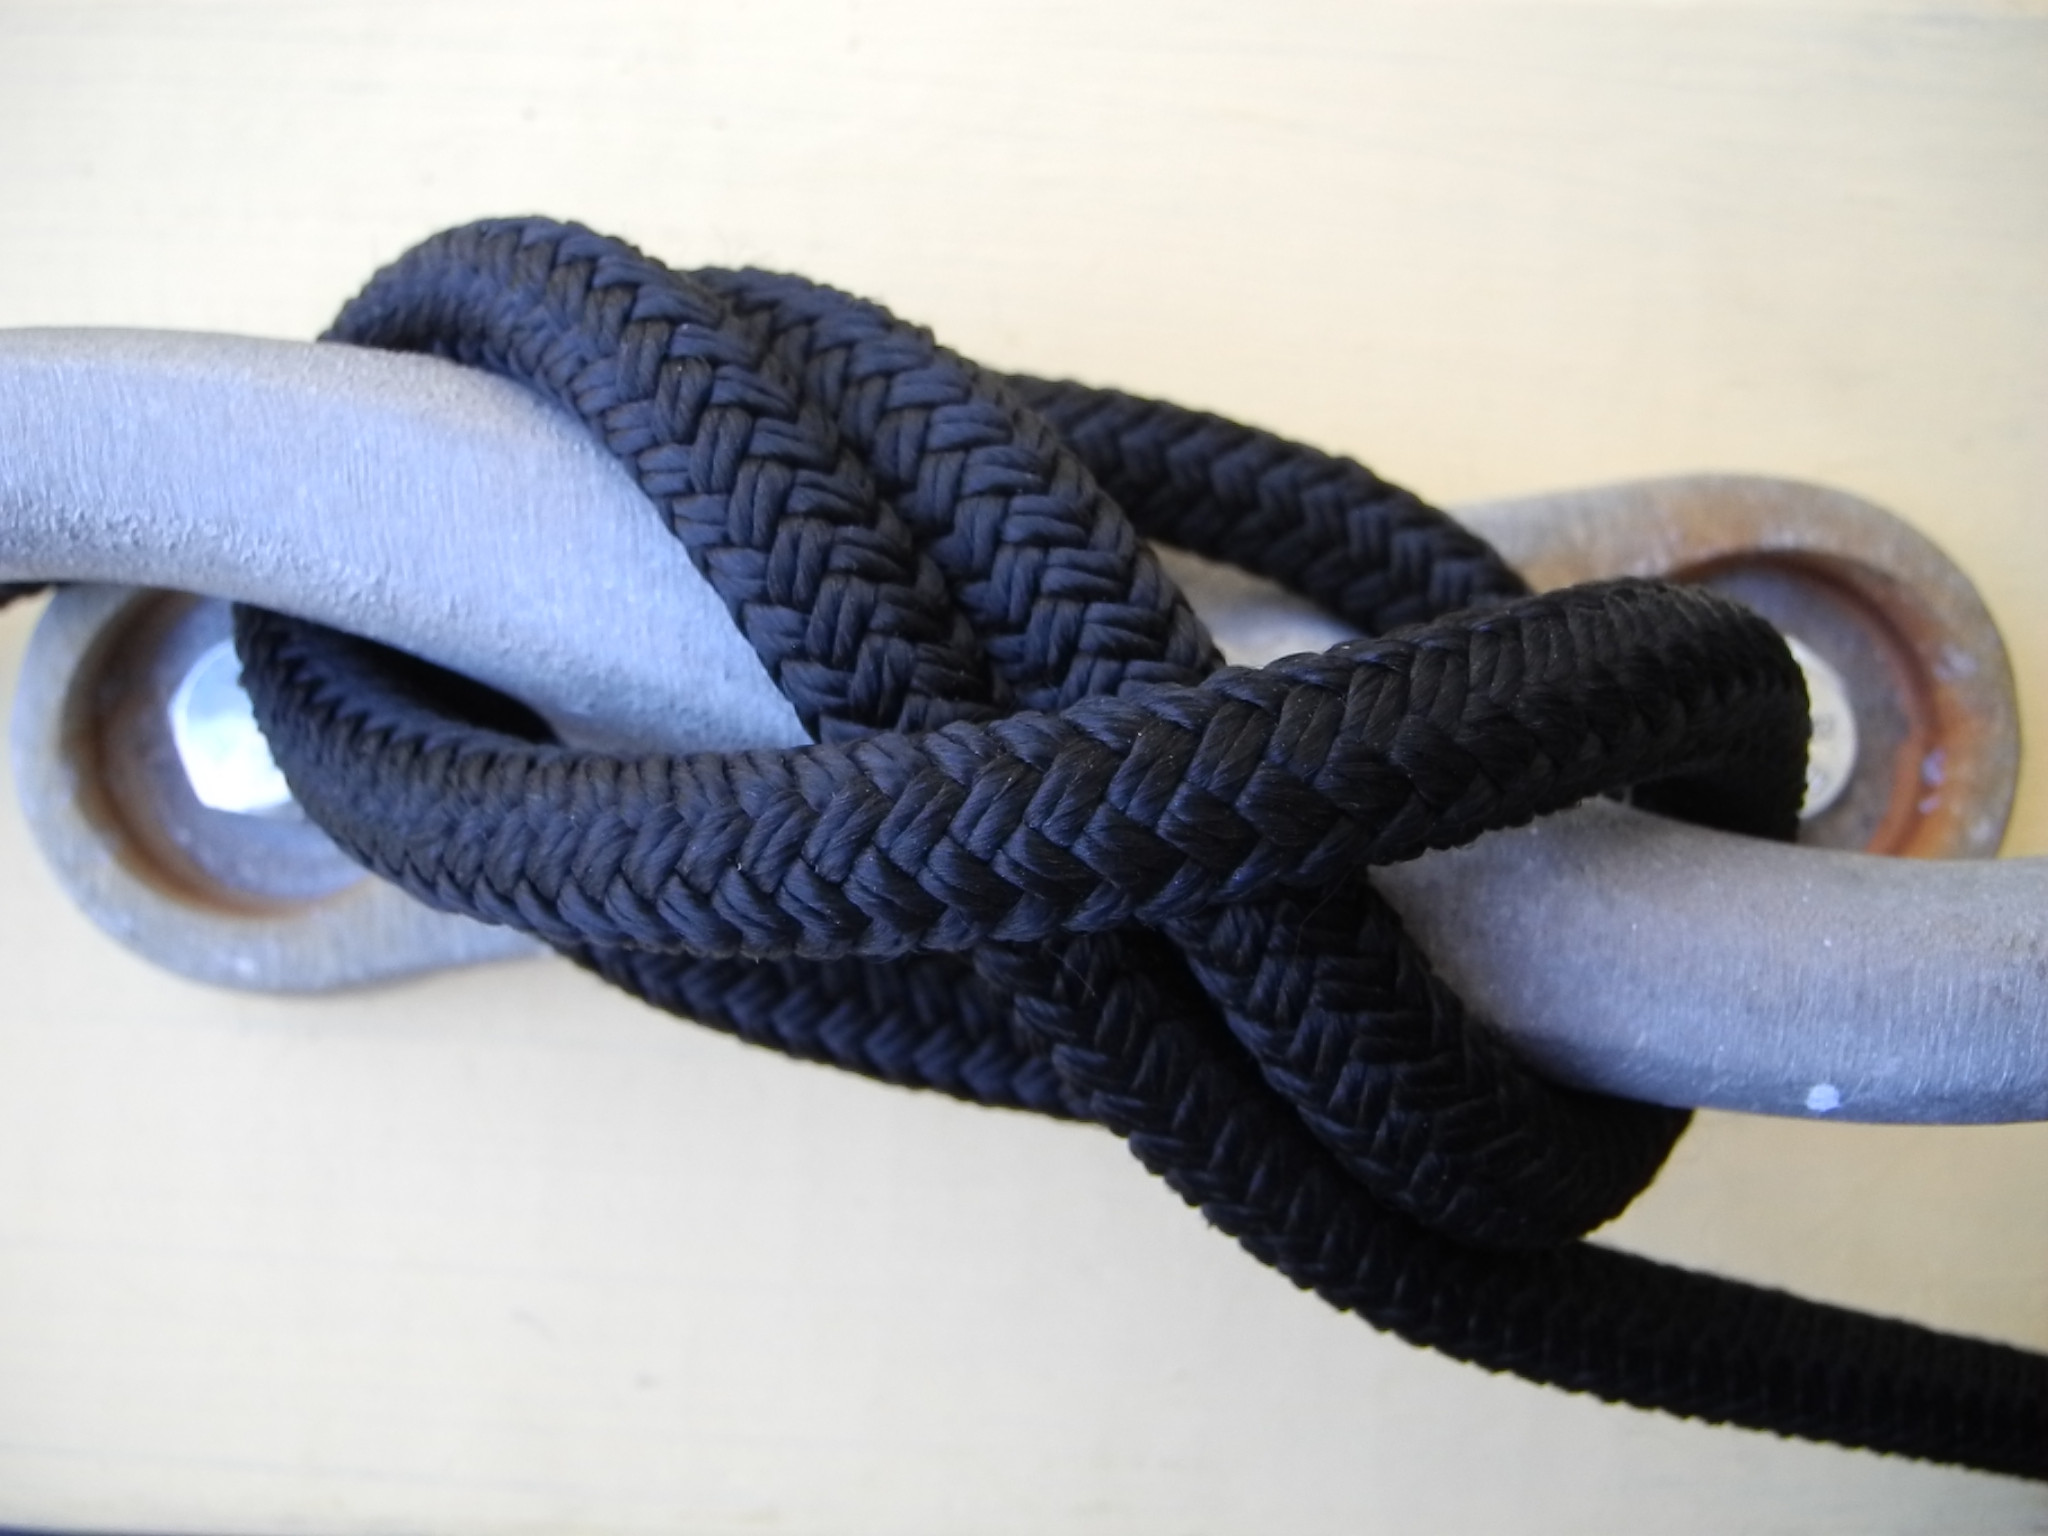
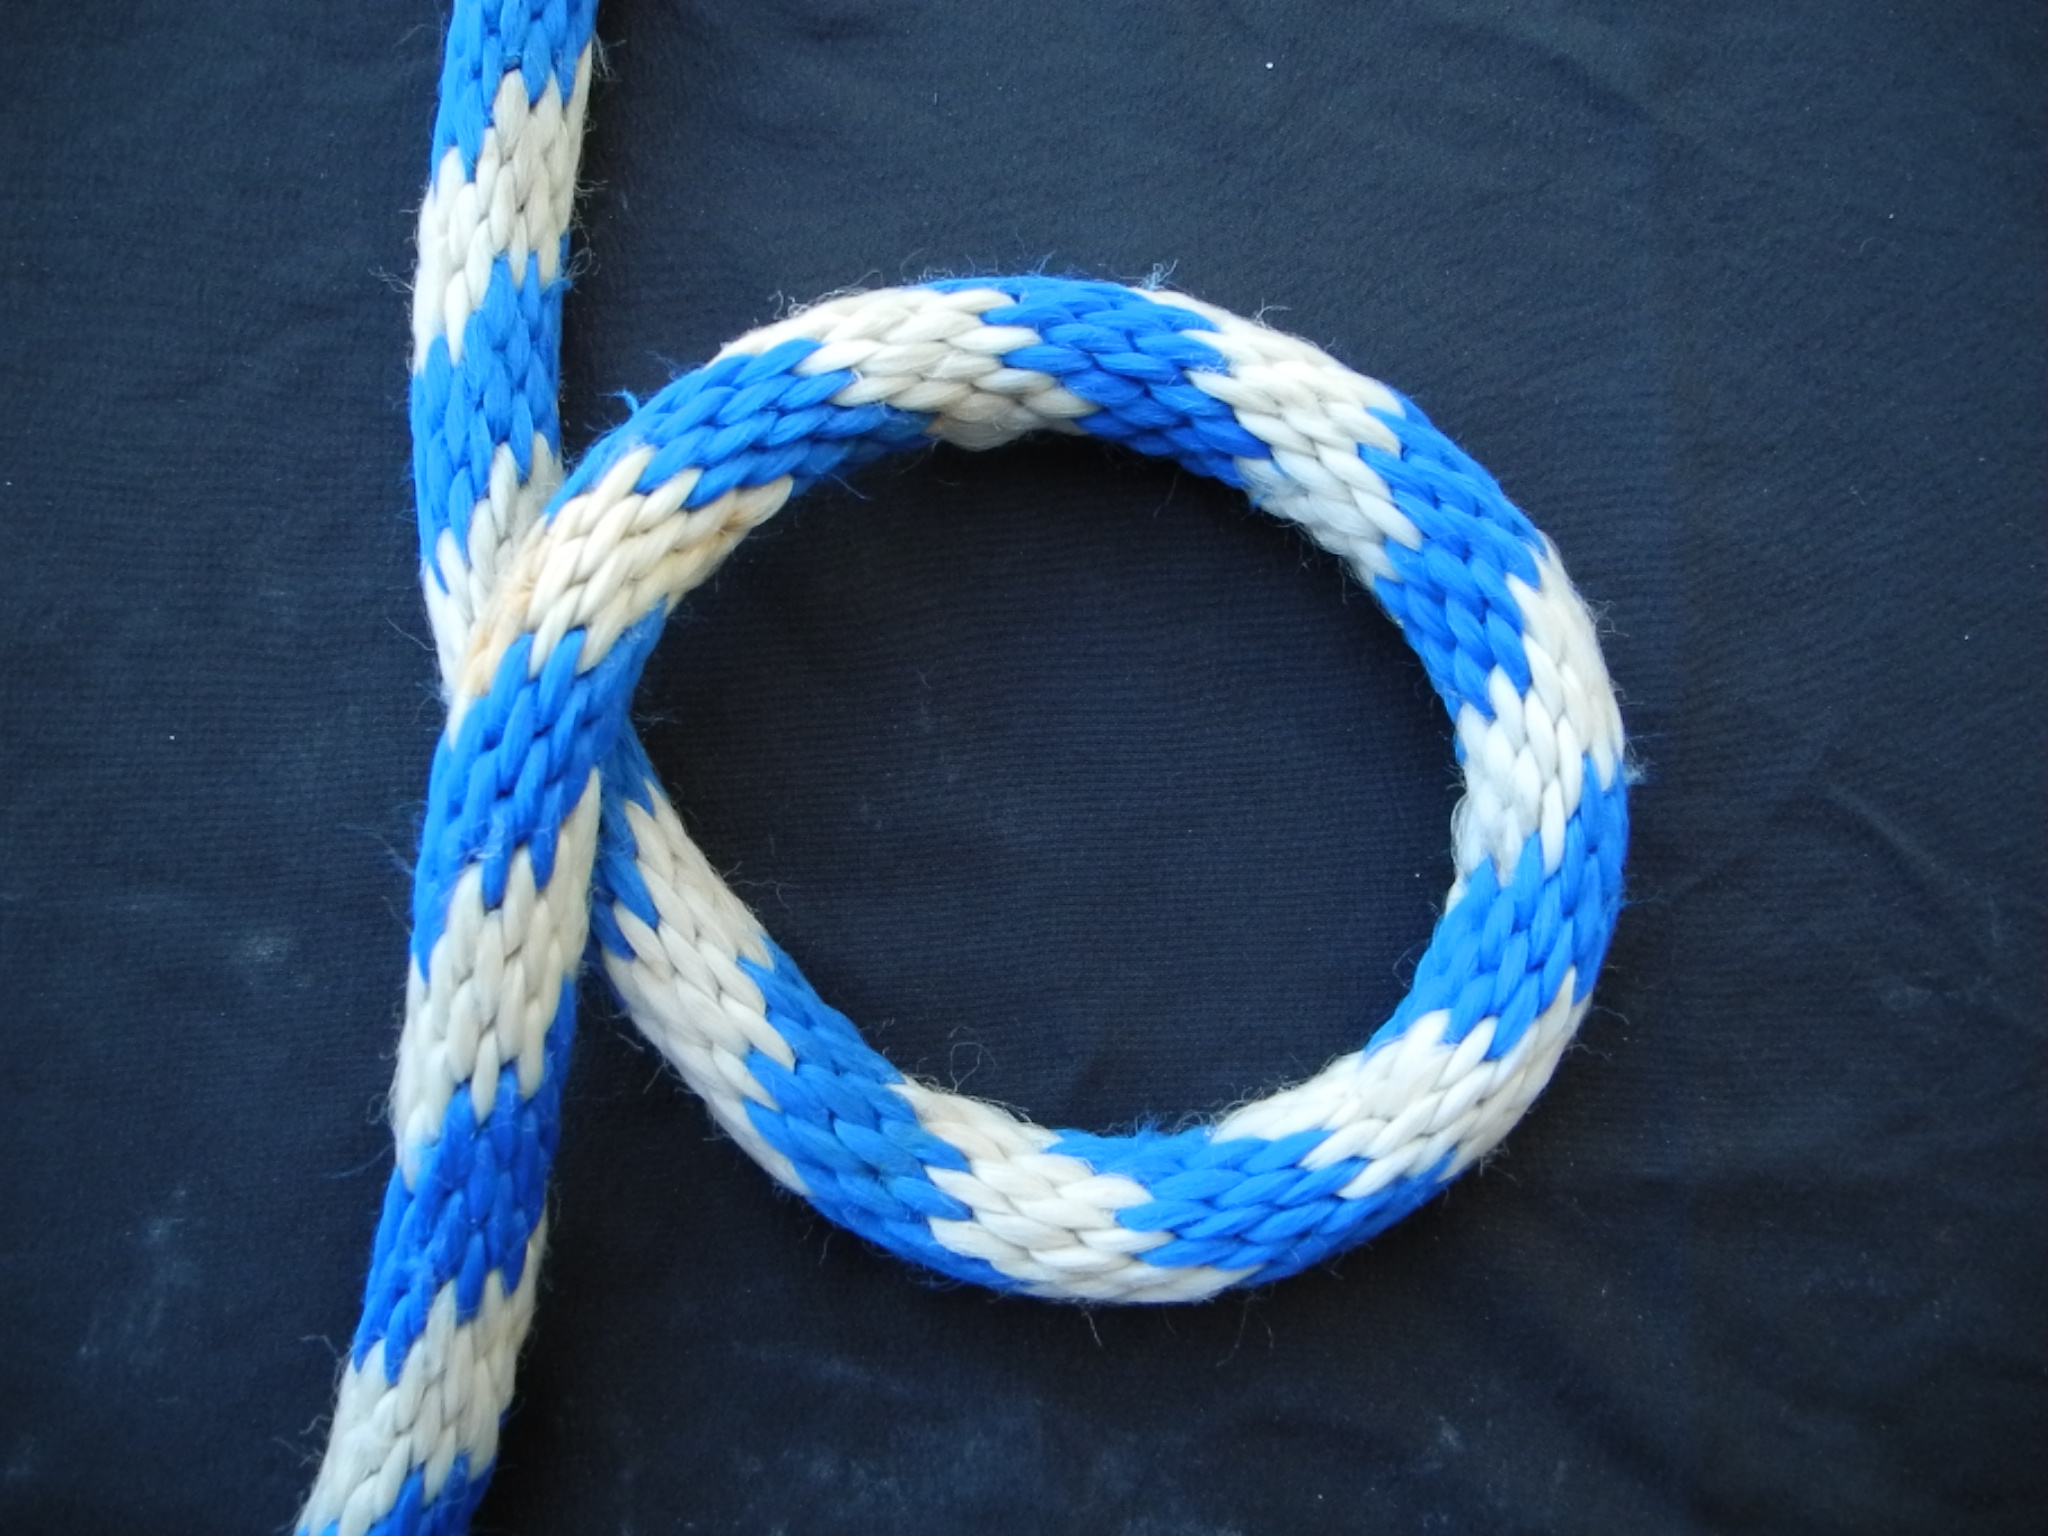
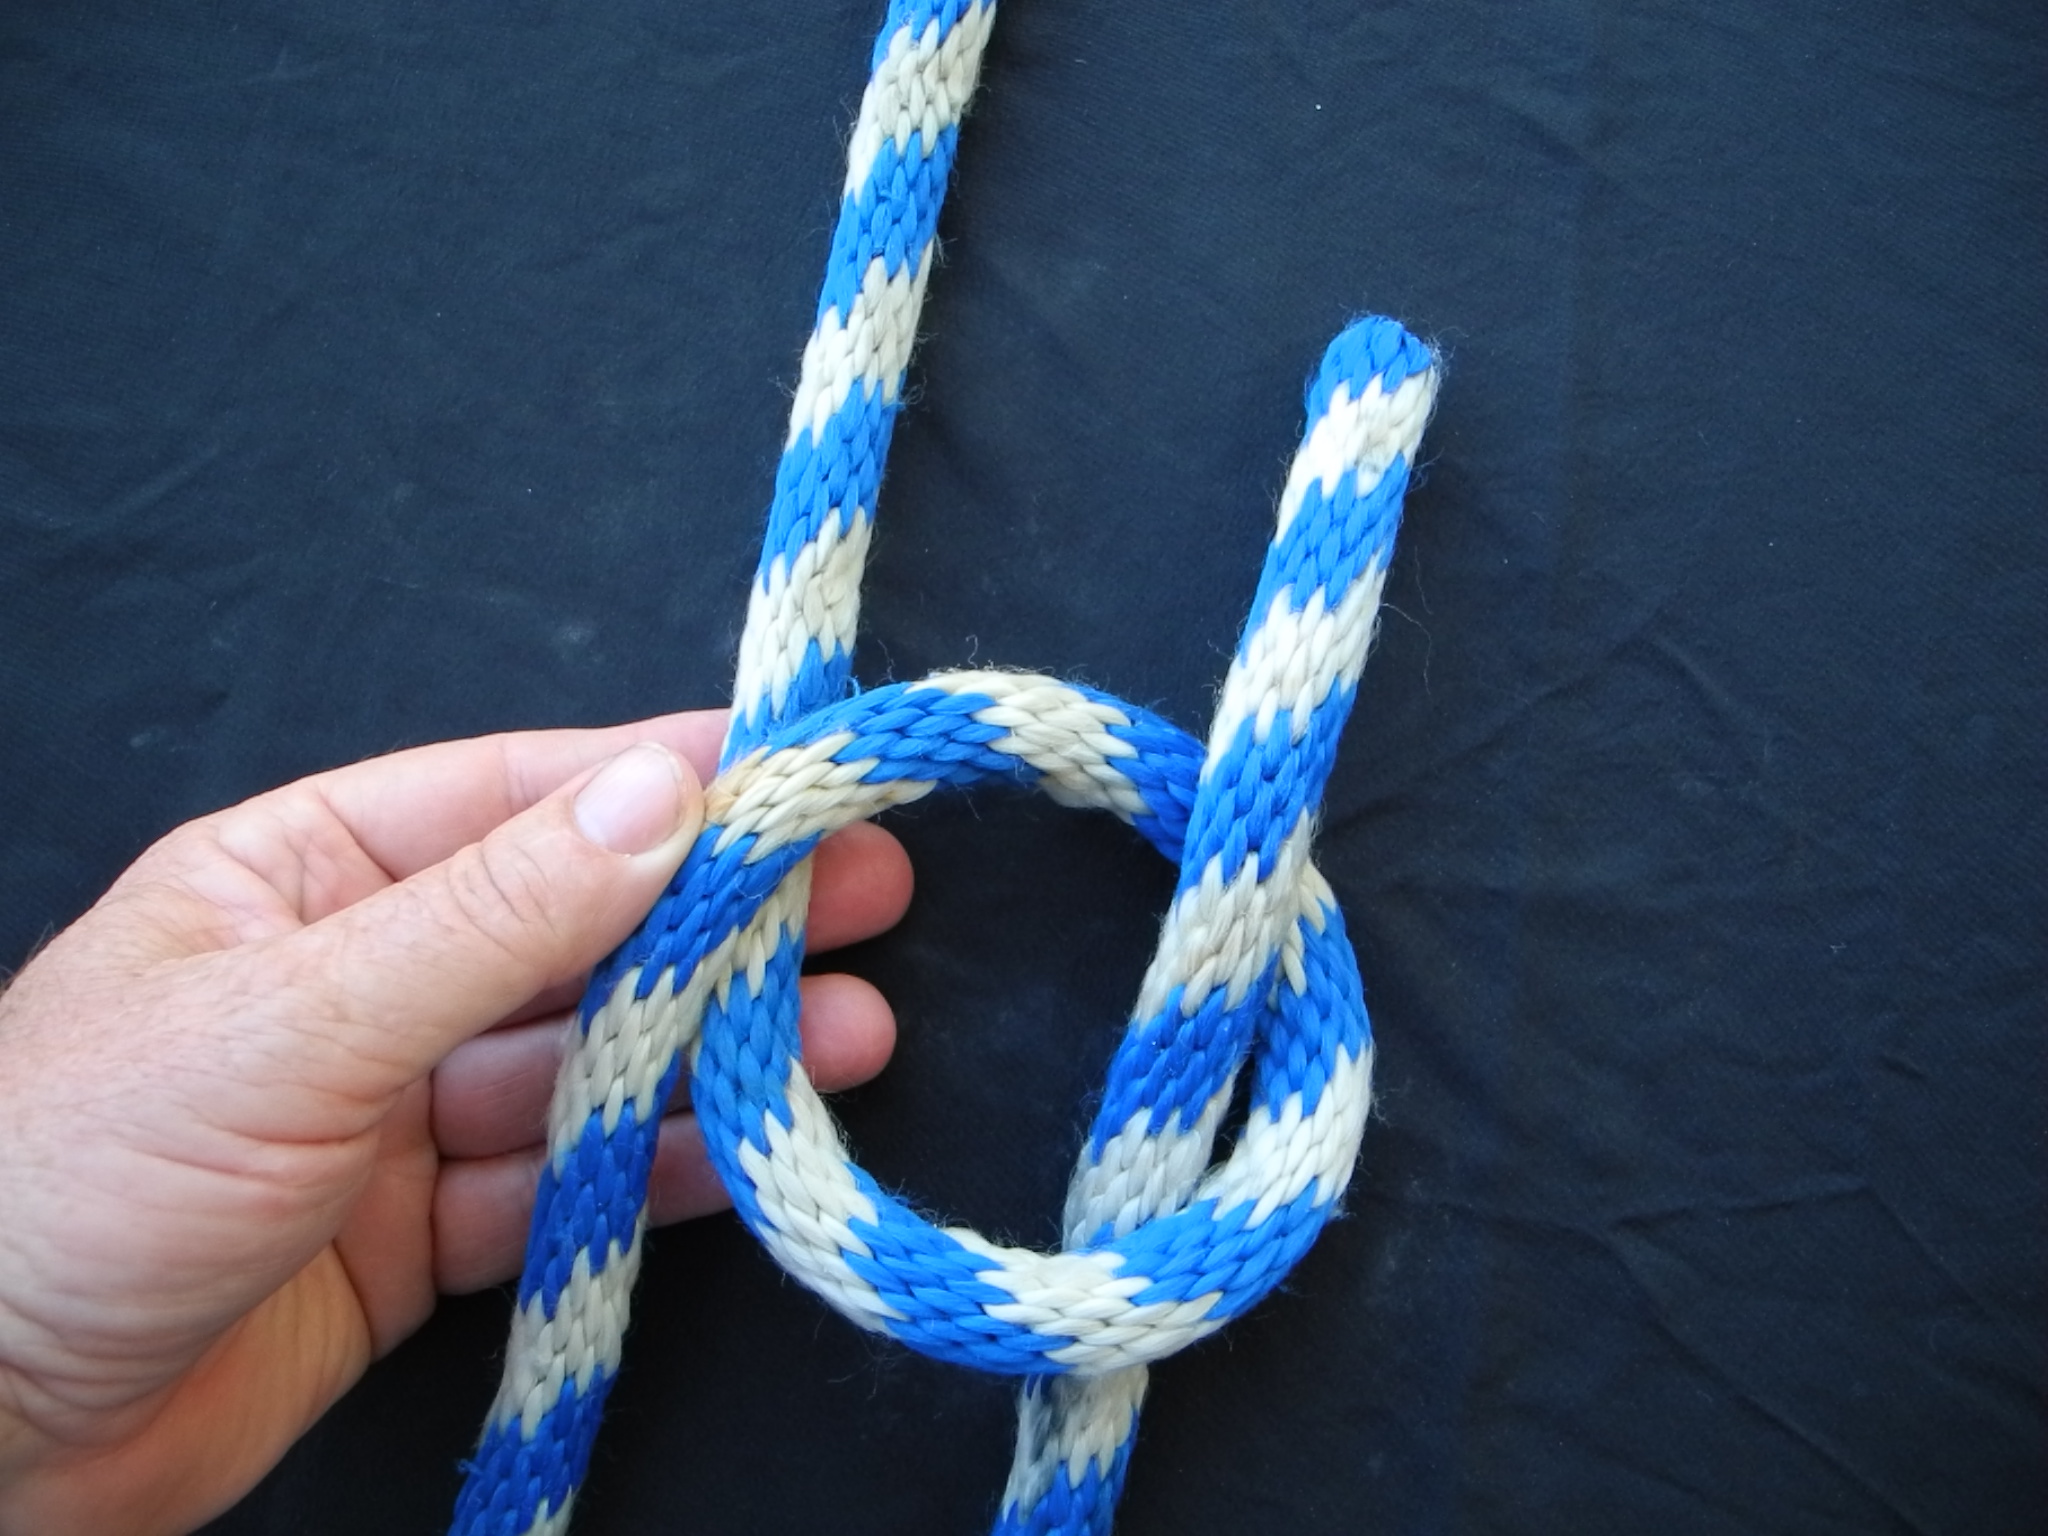
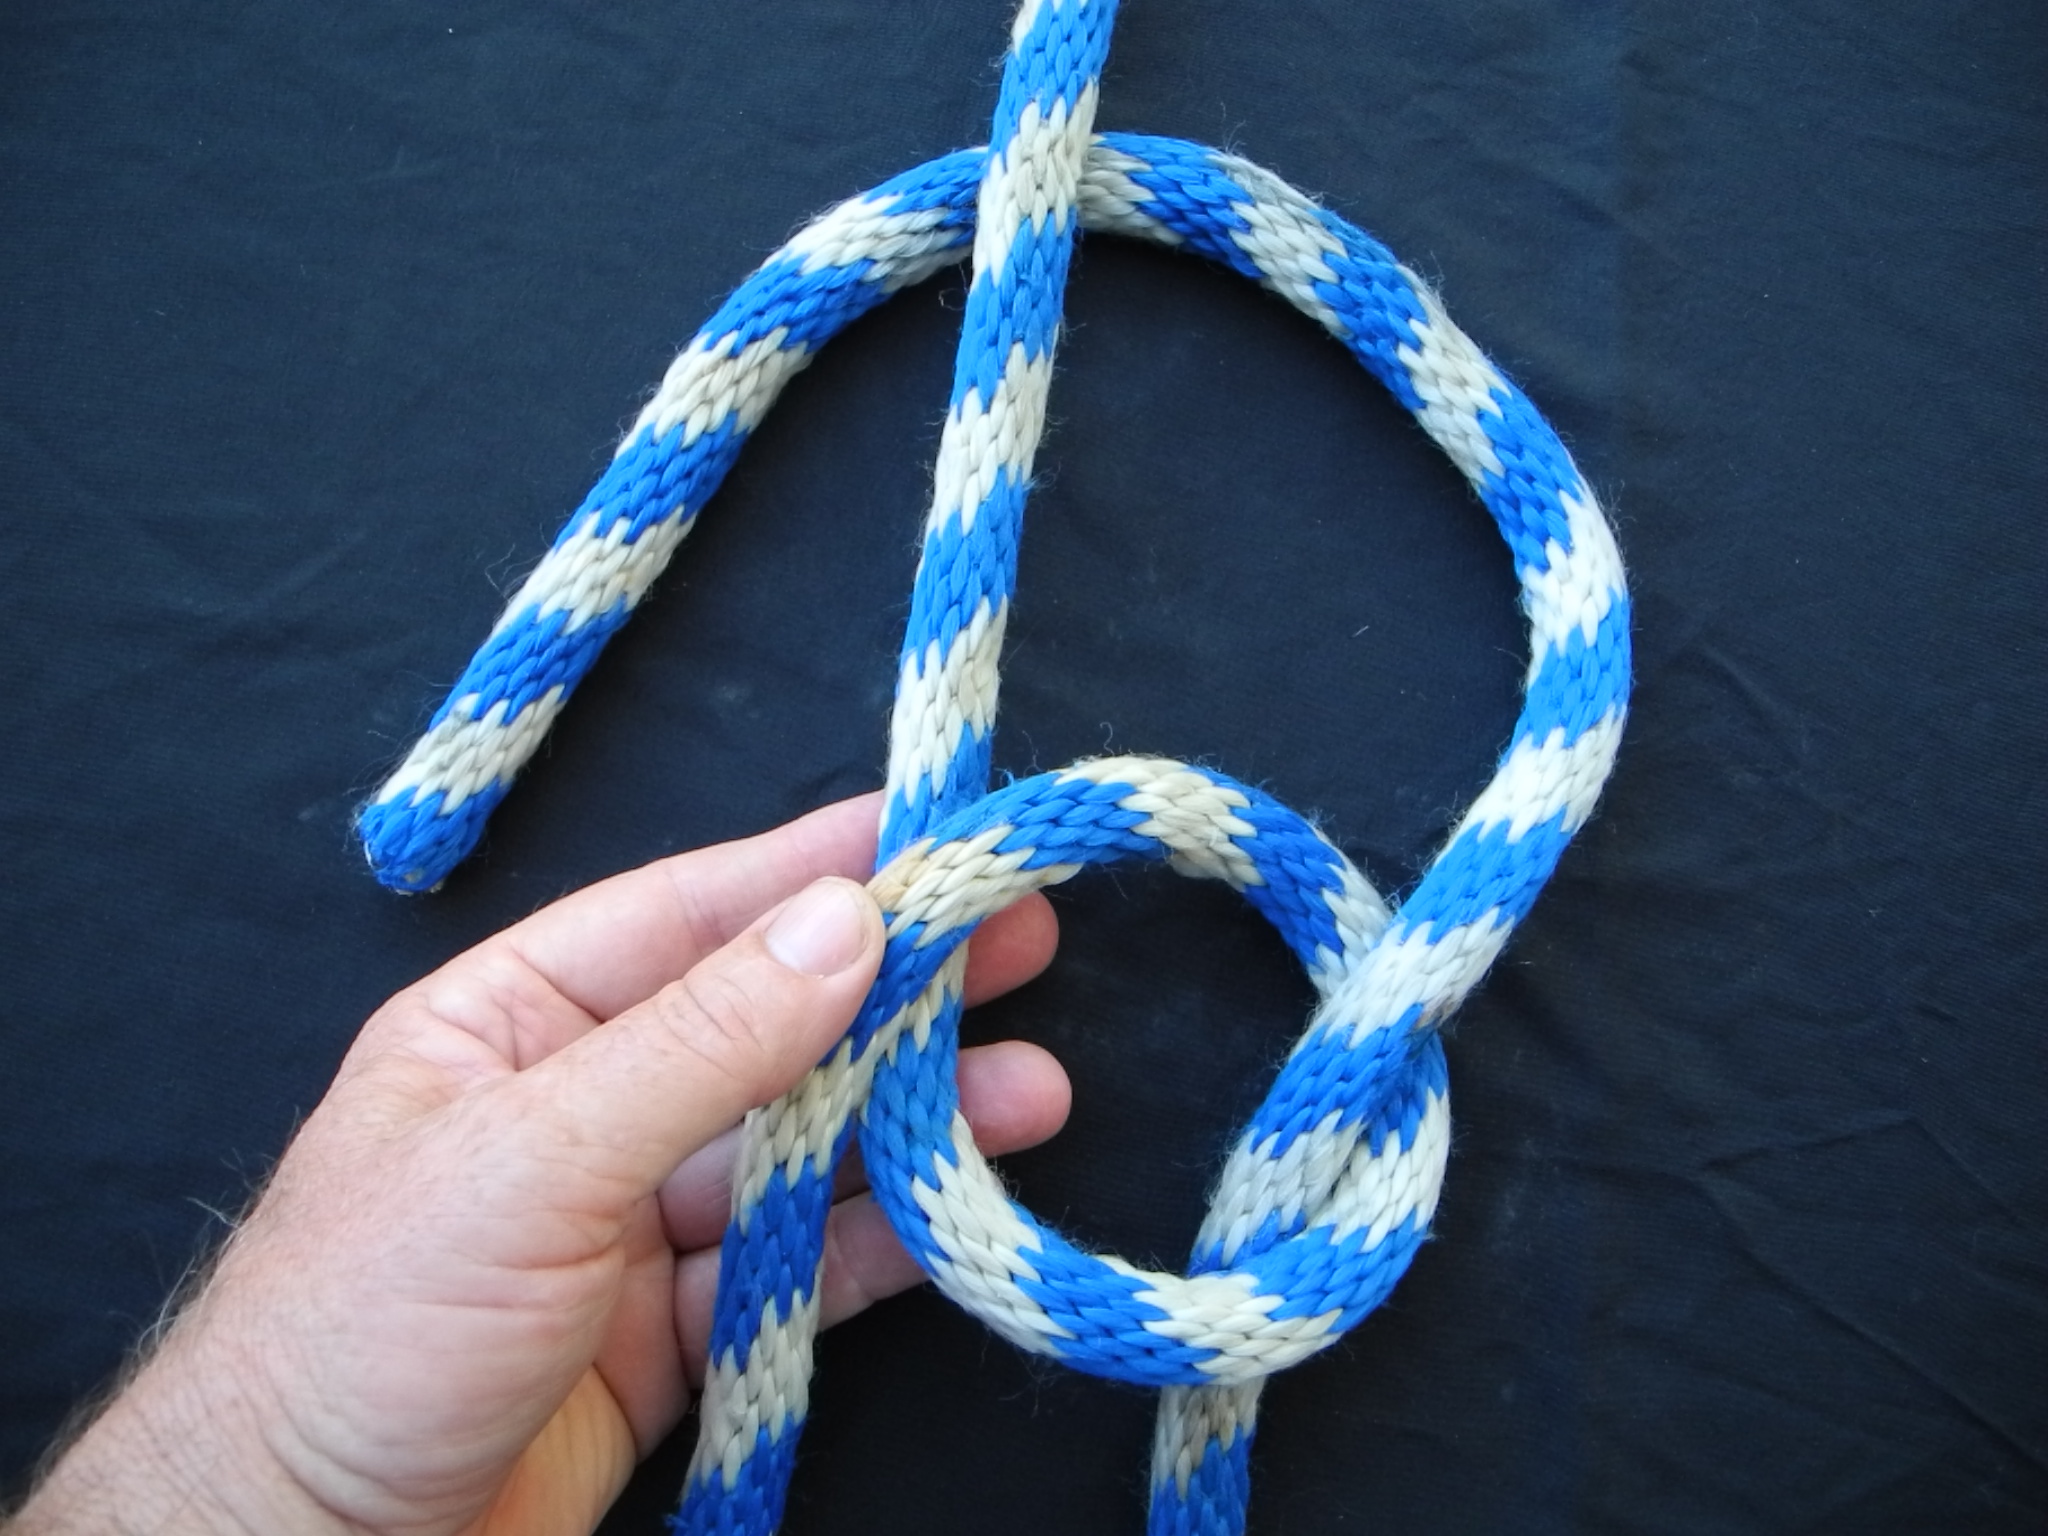
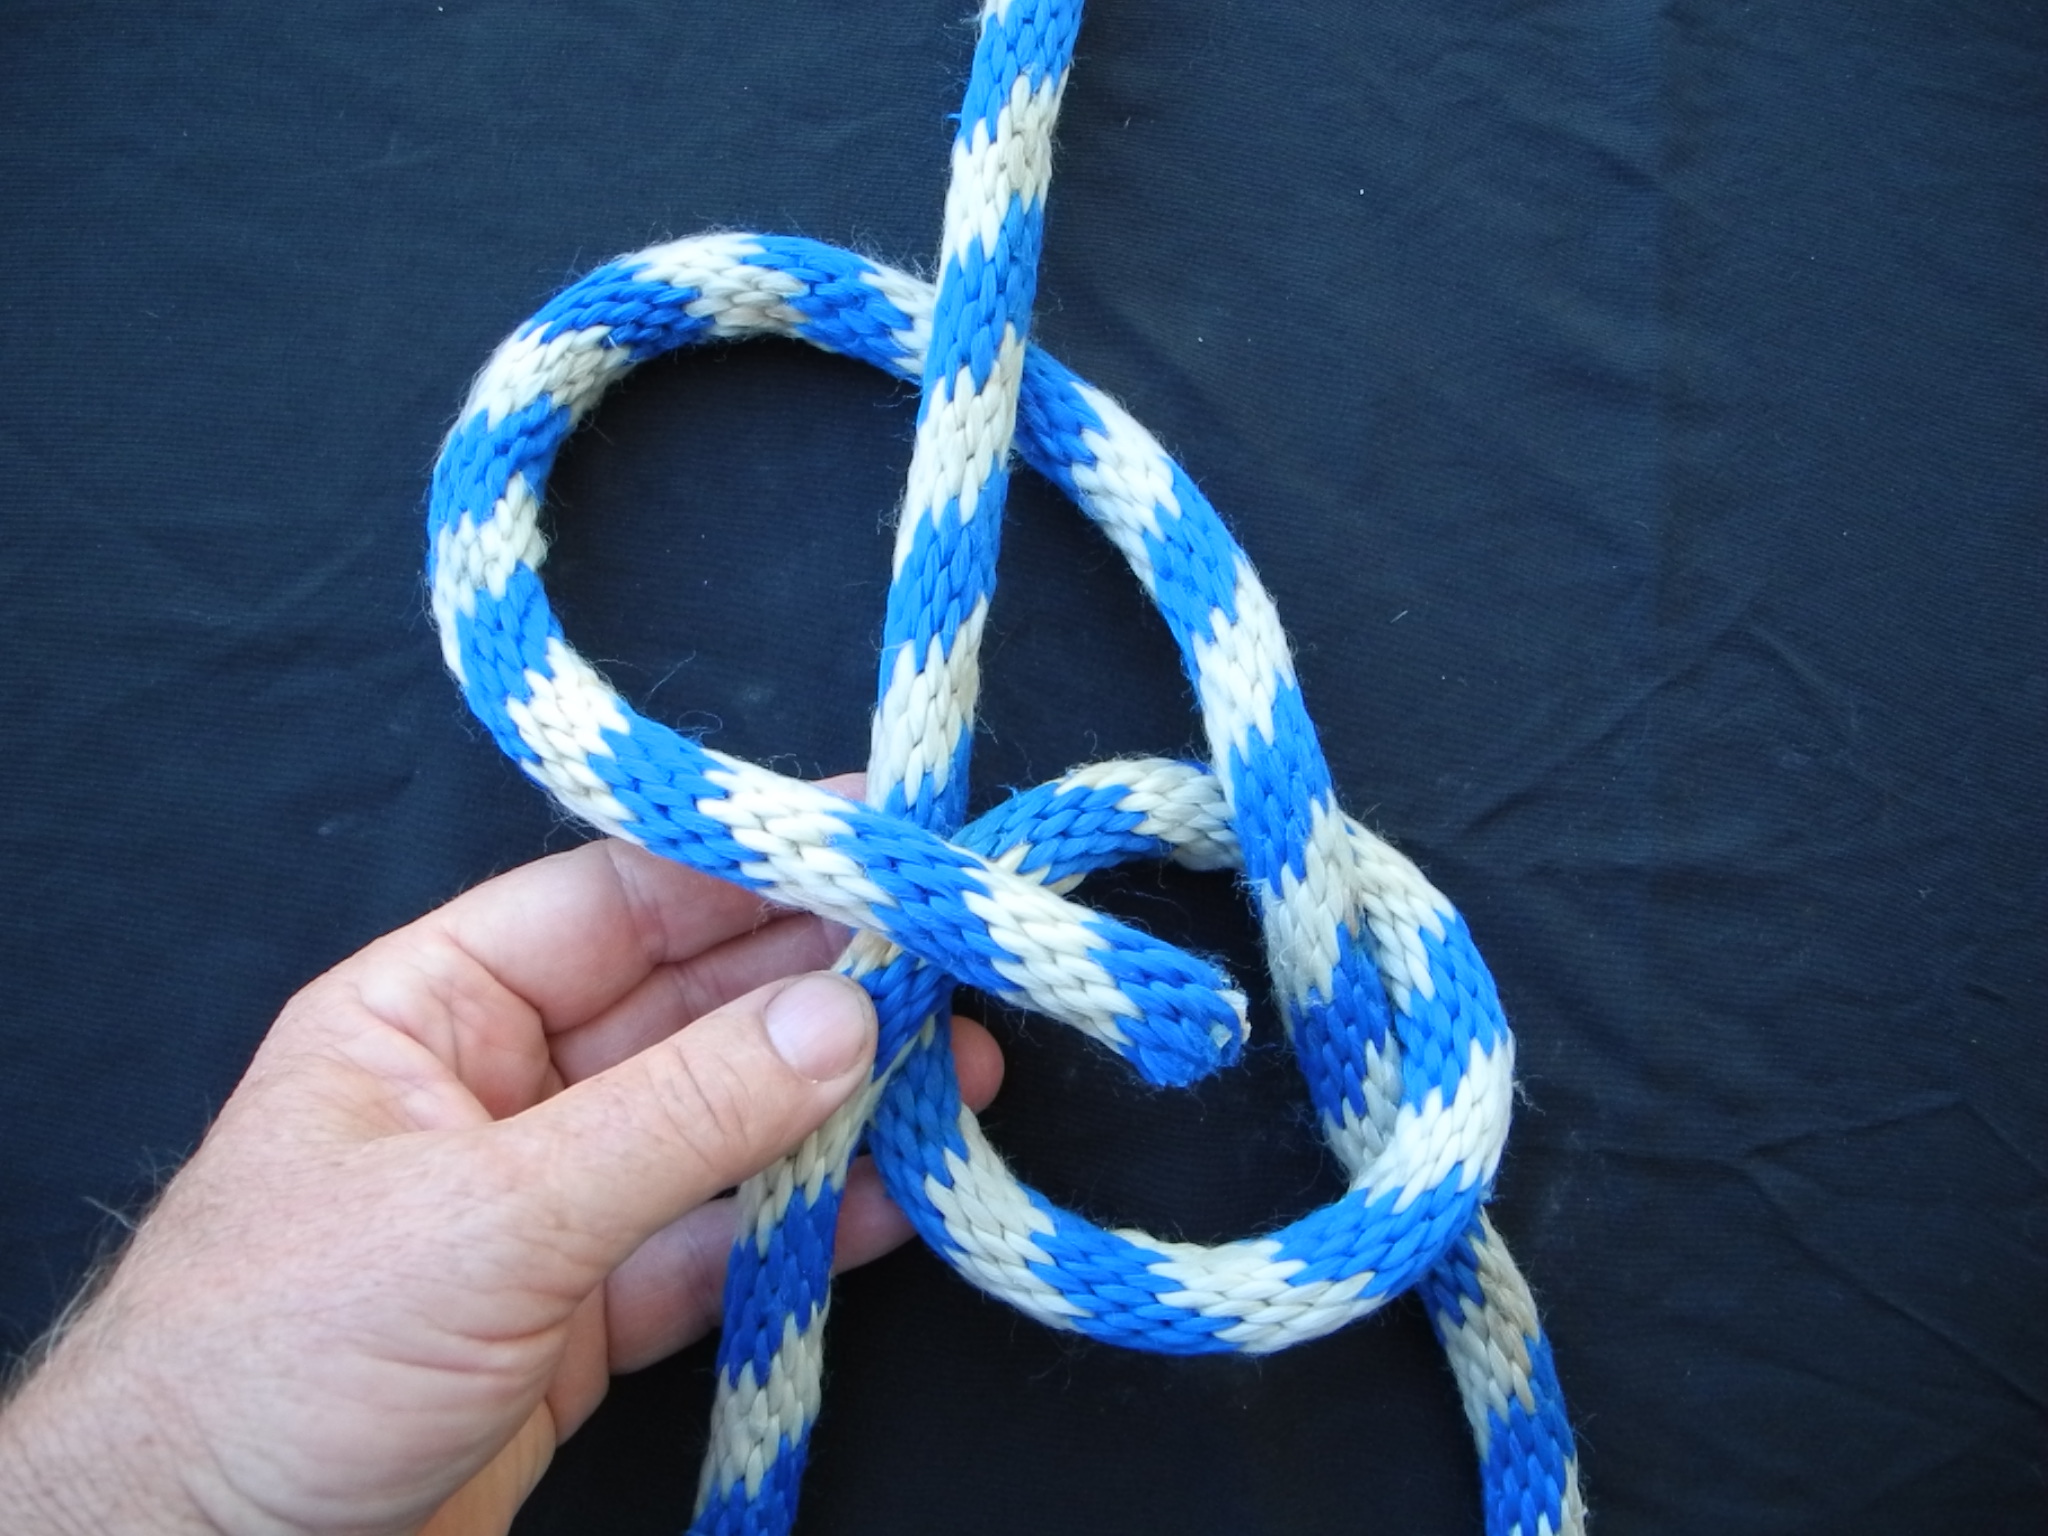
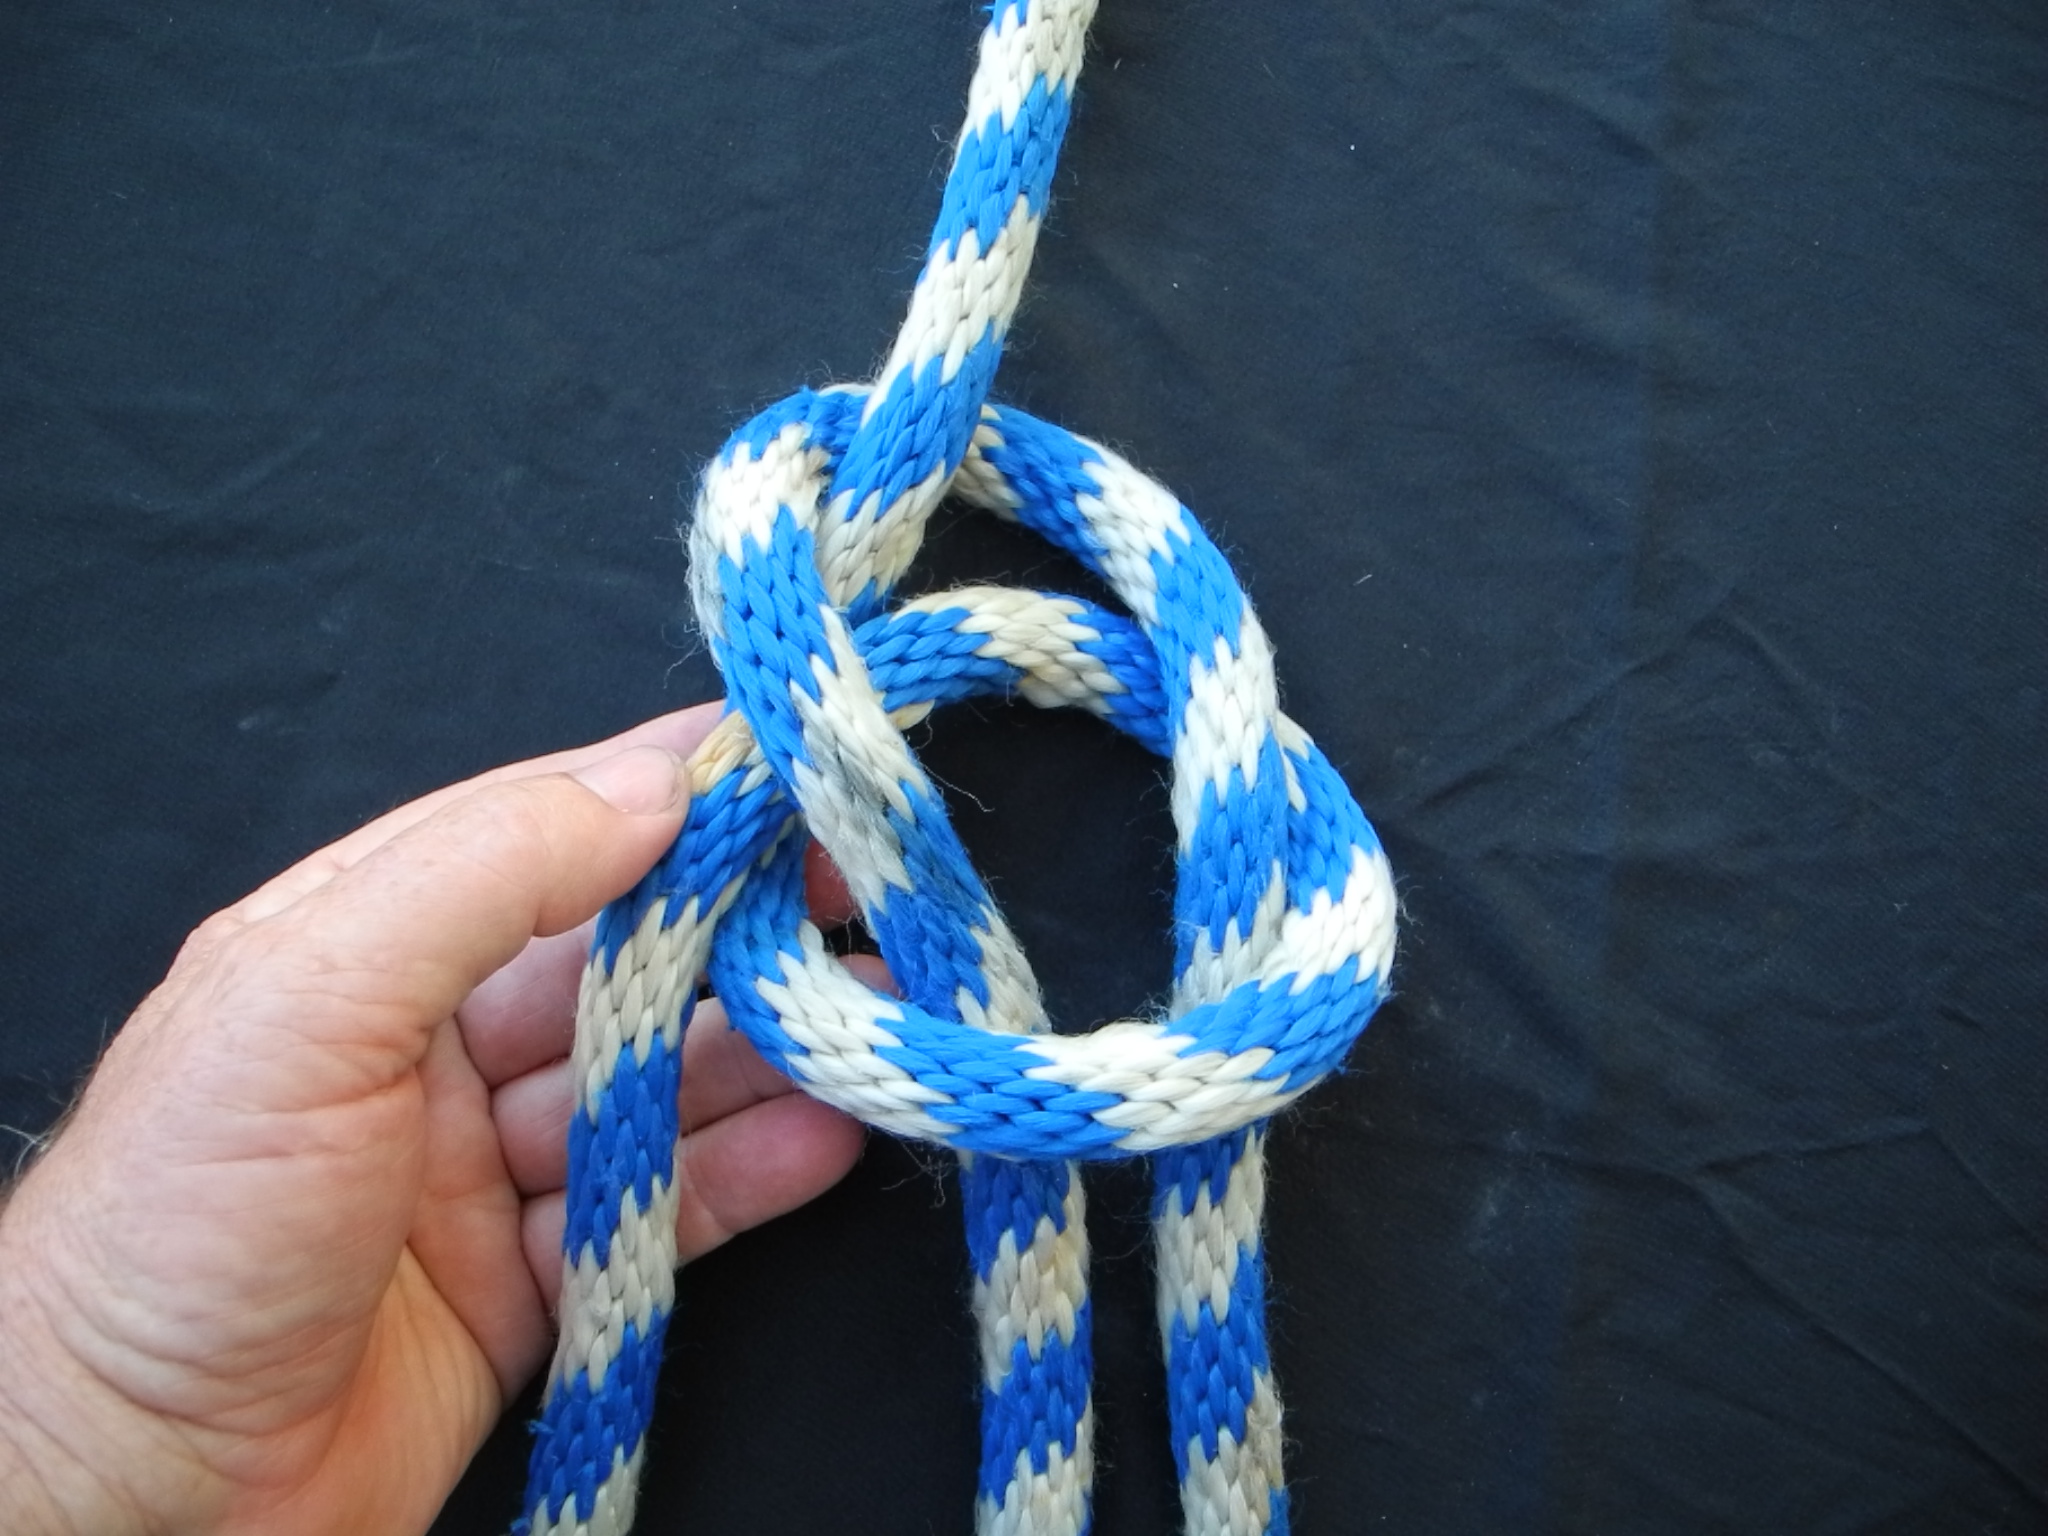
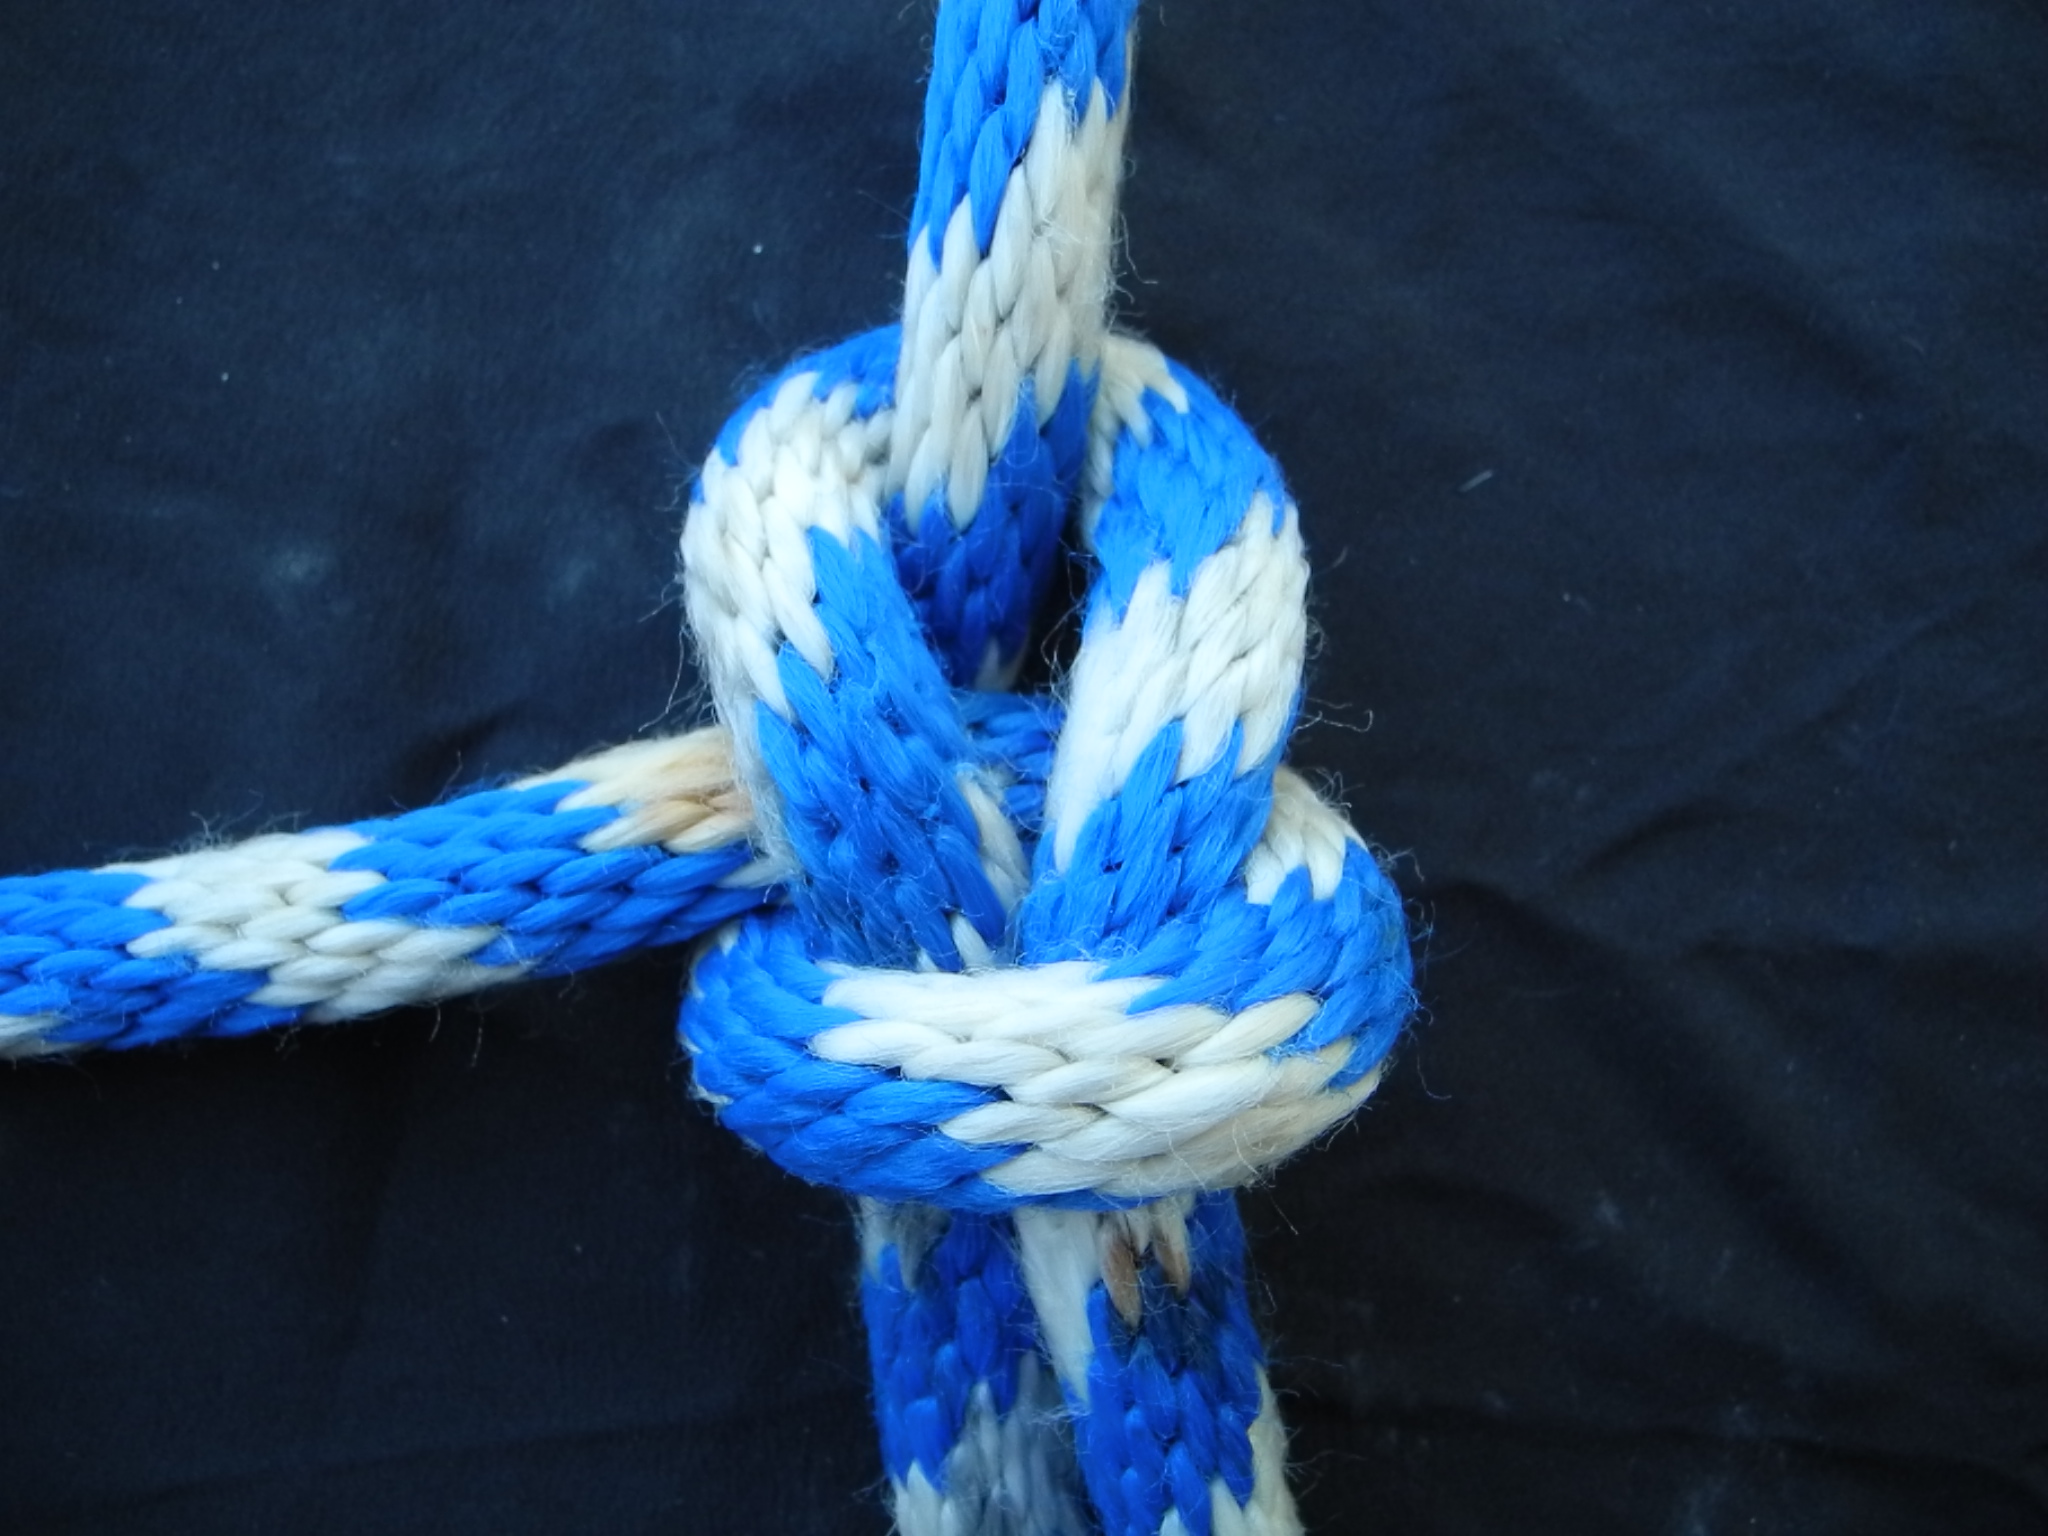
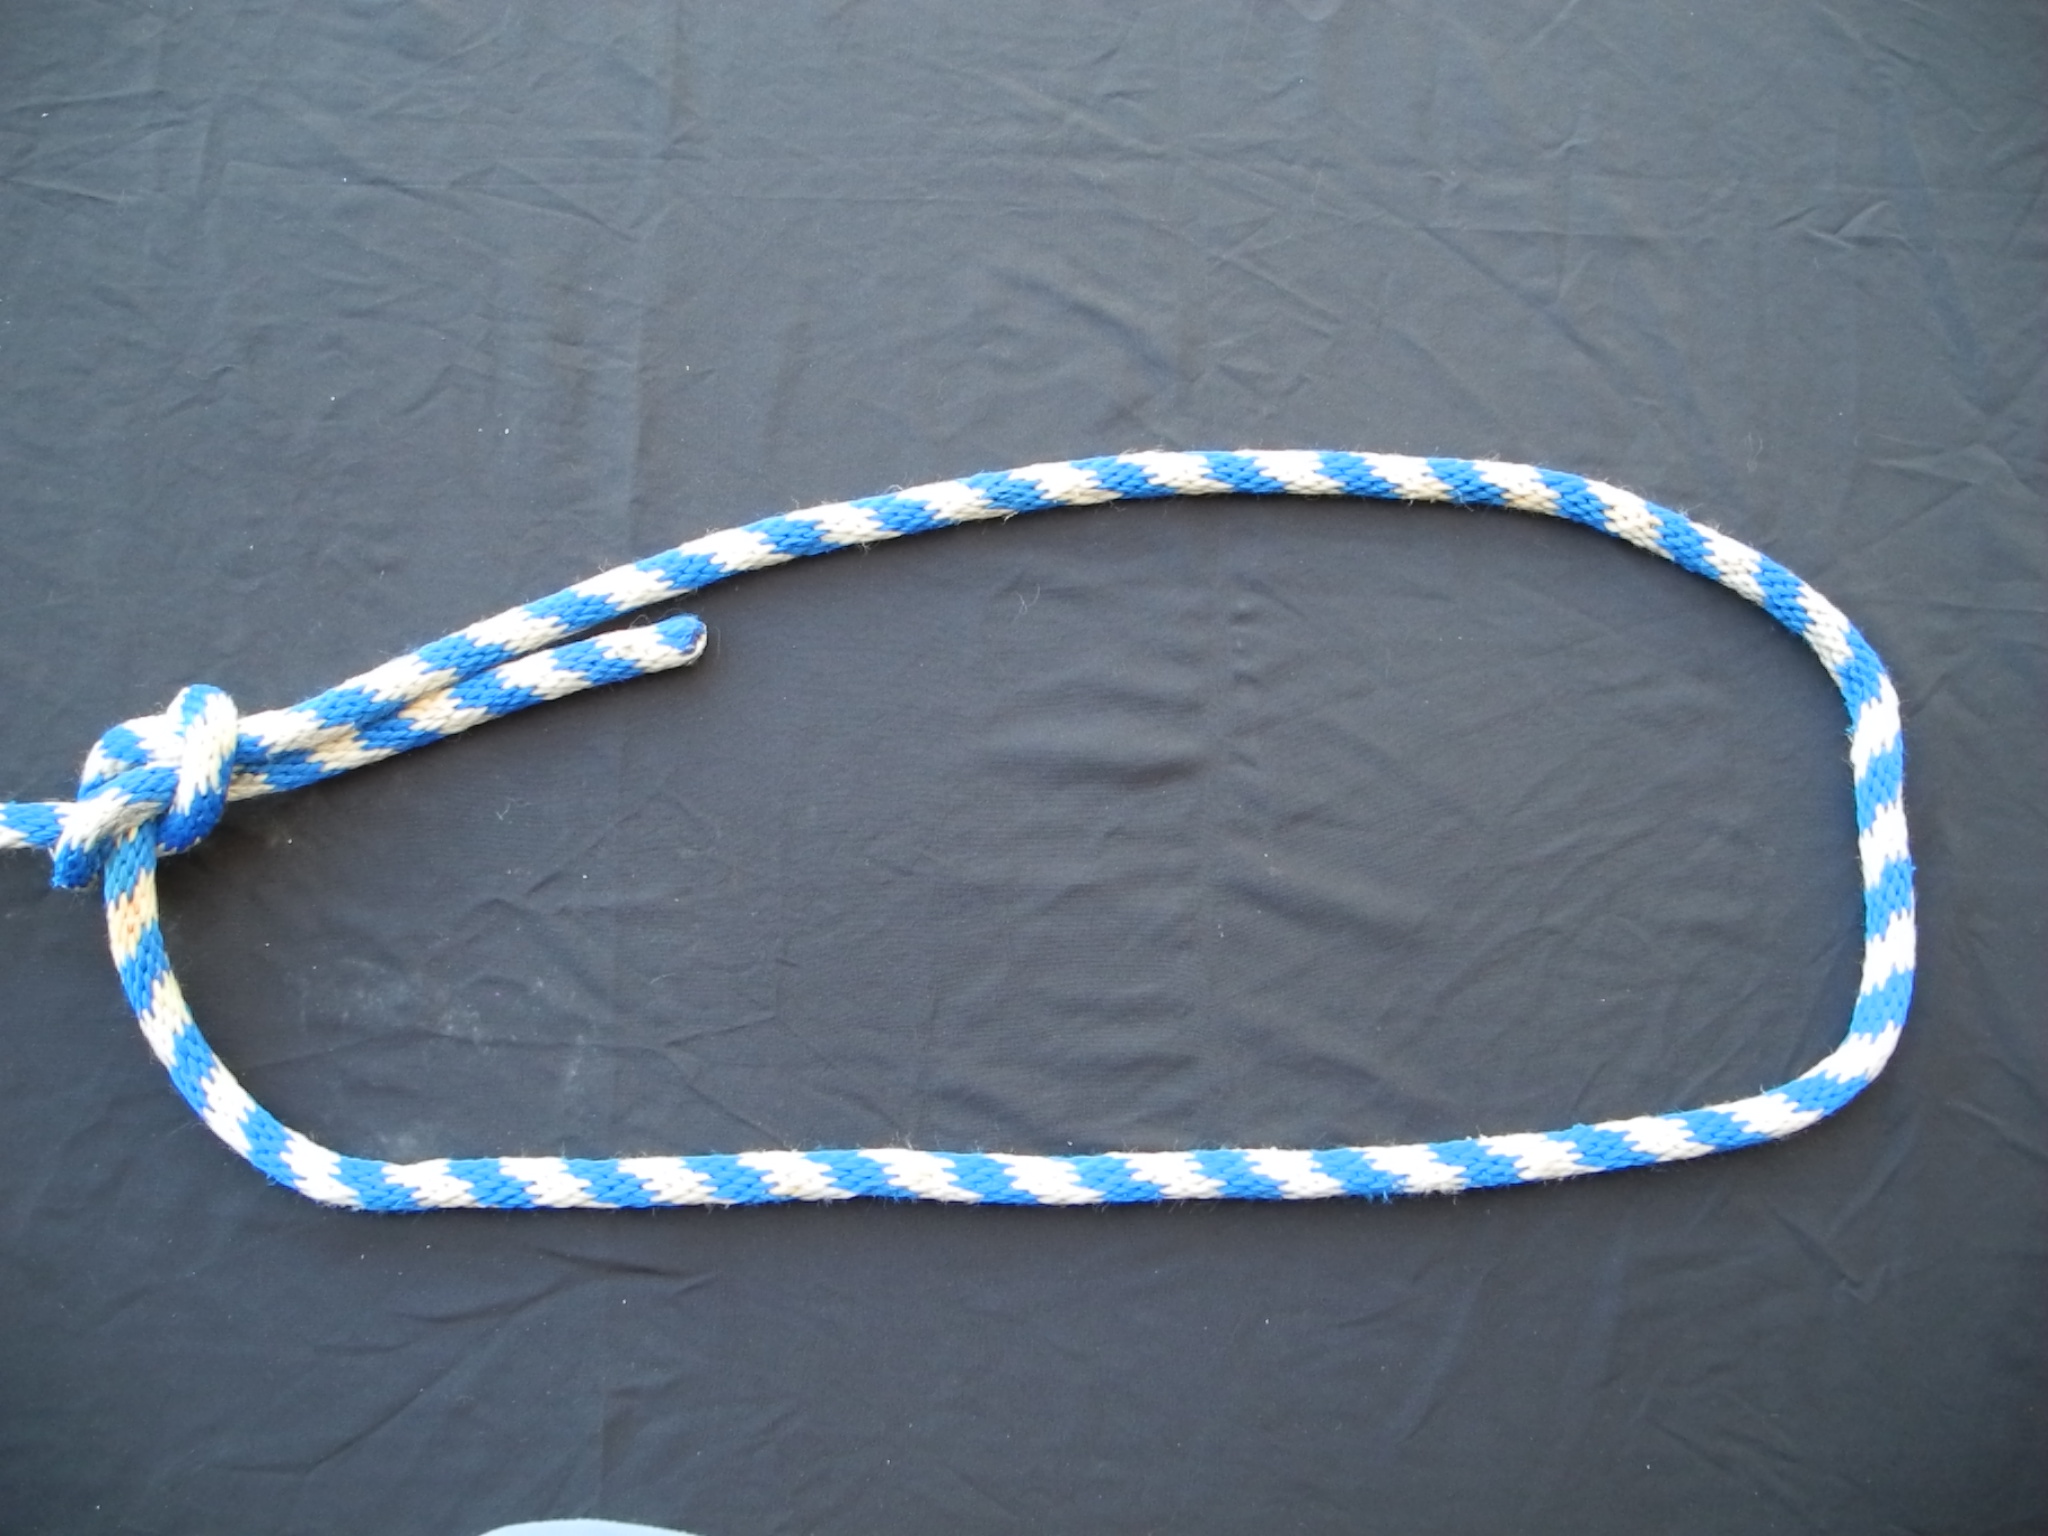
Bowline
First let’s make sure we all pronounce this one correctly then we will get the knot tied right too. Think of a hunting bow and arrow and leave off the E. Now say bo’lin like you are from New Jersey and you are knocking down a few pins on a Friday night. Bowlin’. That’s it!
A bowline knot has many uses both on boats and off. The more you practice this knot the more uses you will discover. Primarily we use the bowline knot to secure our lines to a free standing piling in our marina slip. We can create a large enough loop to slip over the top of a piling. For those with cowboy roping skills you may not need to get close when you toss your bowline loop toward the piling but we will stick with using our boat pole to help drop it over the top.
Do not be tempted to take the existing small loop at the end of your line and invert it, choking it around a piling. While that may be the quickest way to secure a line, I promise that it will not be the easiest line to remove when you are trying to leave the dock. And what do you do if your neighbor chokes his line on top of yours? A choked line may need to be left behind in that situation. But if you’ve got a bowline knot then you can simply untie the knot and be on your way.
It is bit easier to watch-how rather than read-how to tie a bowline so we suggest you look at the photos below of a bowline, watch our video and practice. Our favorite way to be sure we have the right-sized finished loop is to start with the line wrapped loosely around our waist. Then proceed to take the rabbit up out of his hole, run him behind the tree then back down his hole. The finished loop slides easily over our head and is ready to go over the piling of our slip…first tied to the boat of course!
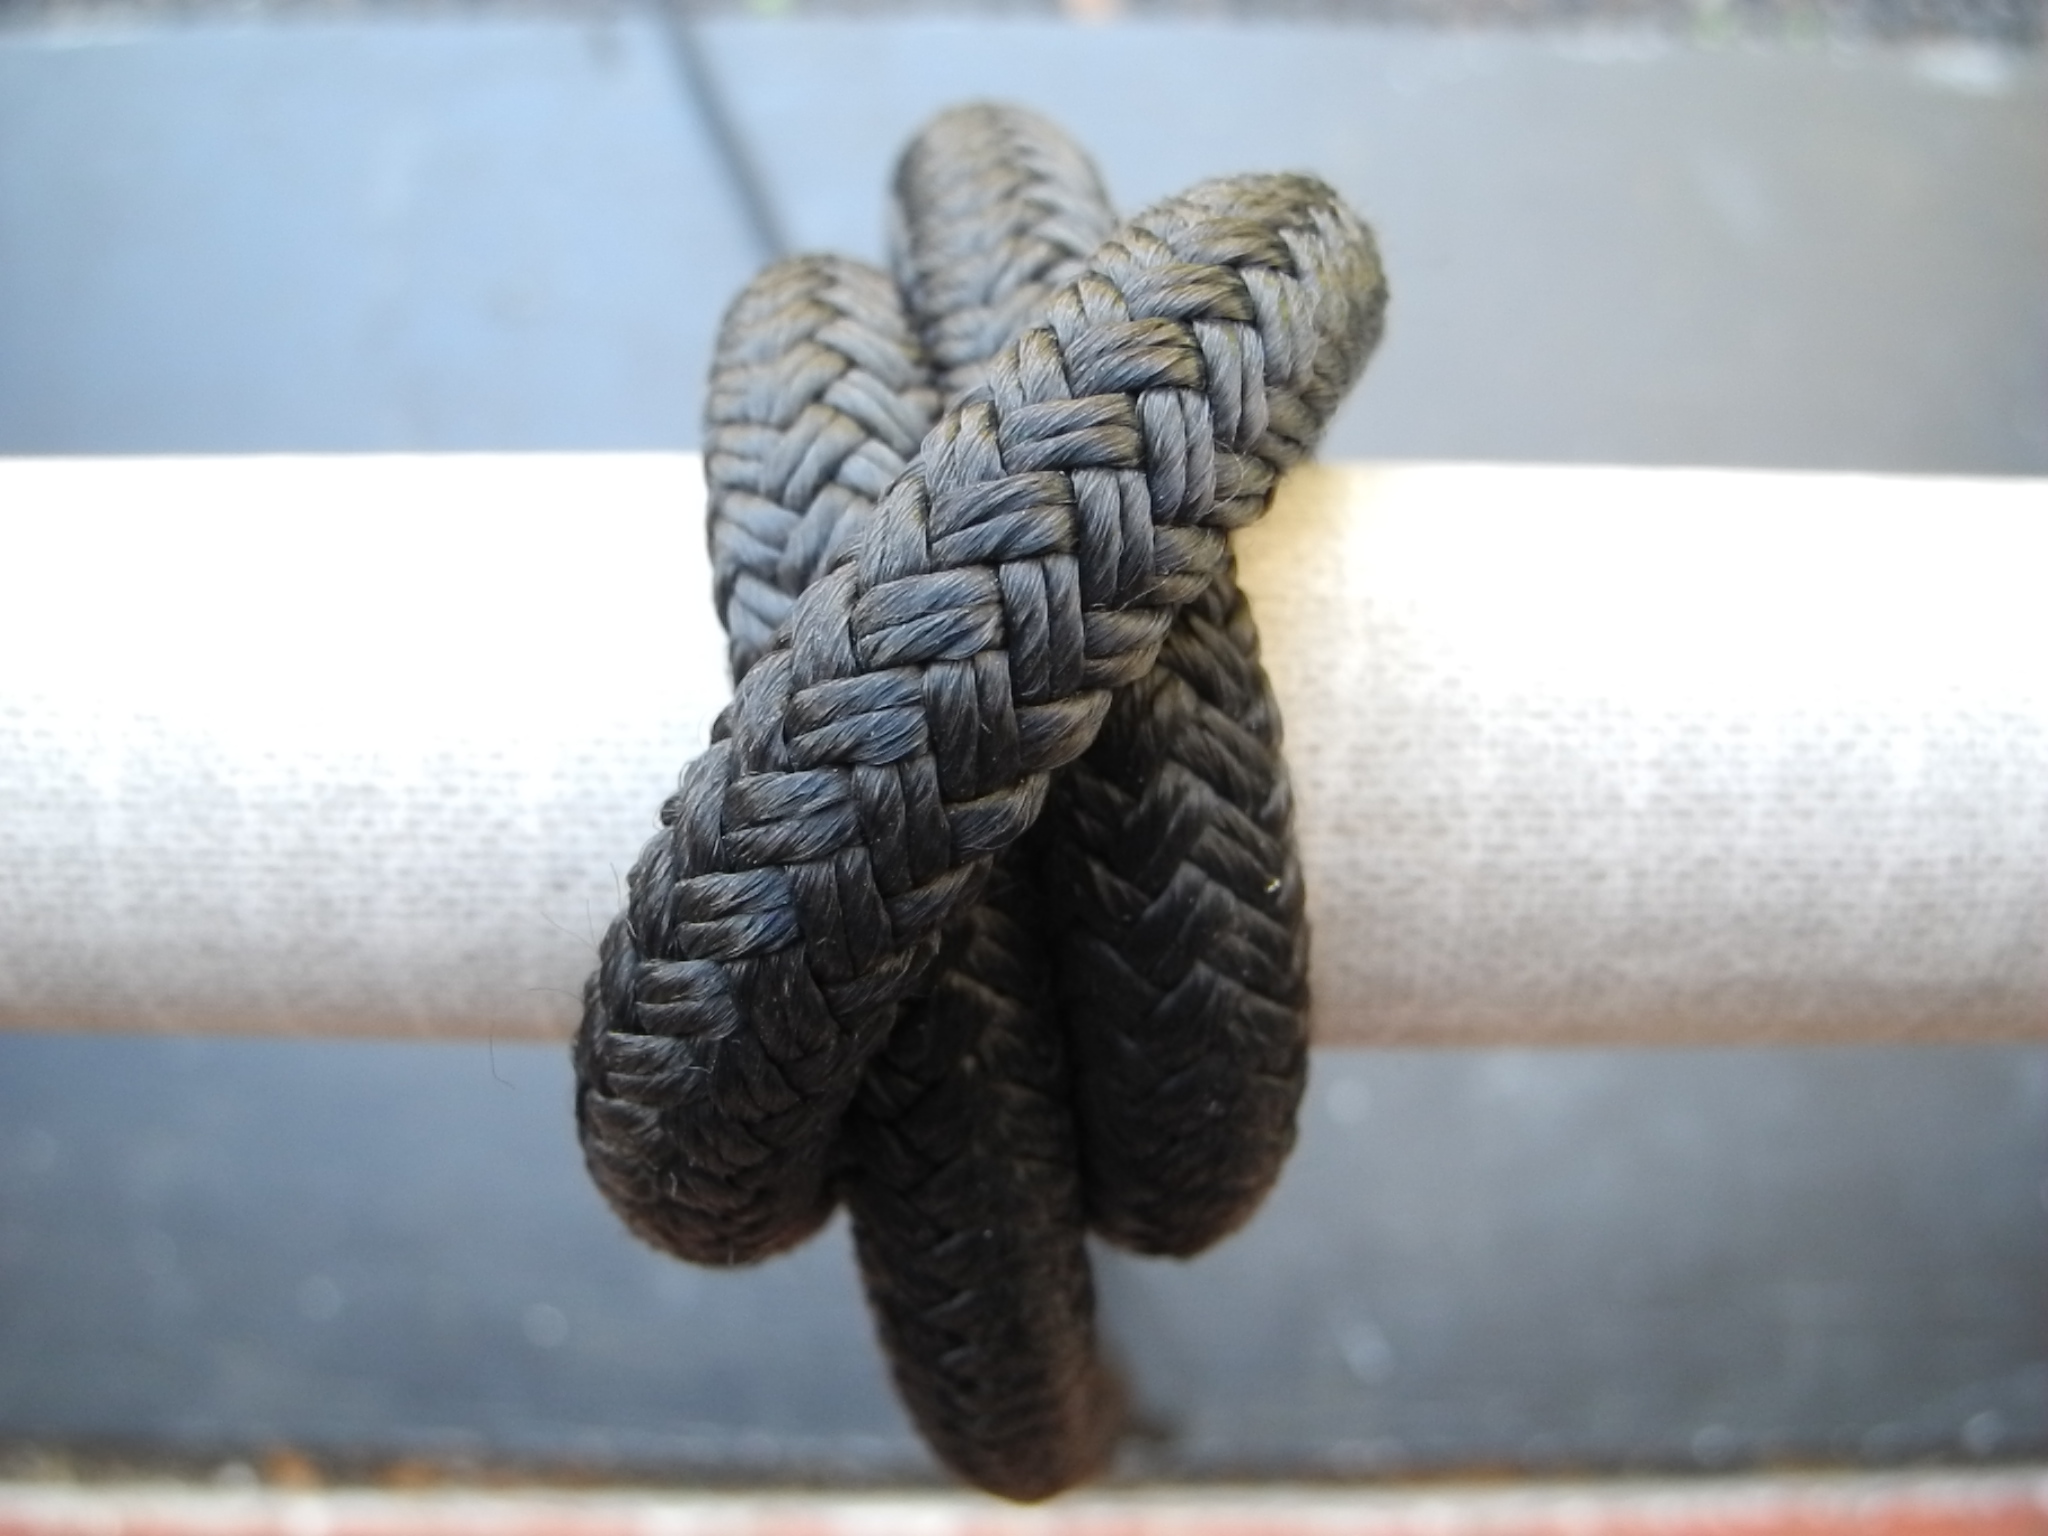
Clove hitch
Another popular knot is the clove hitch which also has many different uses aboard your boat. The most common reason we tie a clove hitch is for fender placement…and re-placement when the marina staff tells you the wrong side. But that’s another story for another day.
Place your fender on the outside of the boat bringing the line across the handrail one full revolution. On the second turn bring the line diagonally across the first turn. Continue under the handrail for a third turn but come under the diagonal line and pull taut. You will see a familiar look- two rivers under a bridge! To move the fender up or down you can just loosen the clove hitch and make your adjustments.
To use this knot when tying a line to a piling just do the same as on the handrail. The difference here is that the piling is vertical and a larger diameter than the handrail. This video is a good place to start.
Practice Practice Practice
As with any new talent, it isn’t enough to simply learn these knots. Have a knot tying contest when your friends gather together at the marina. Bragging rights are all you need for a prize. Even if you don’t yet own your boat you can create a skills lab with a small board and attached cleat. Add a few feet of line and you have a great present for any new boater.
Practice creates muscle memory so you can quickly tie a knot…not a lot!
Learn more at a Seminar
Join us at an upcoming Cruising 101 FUNdamentals seminar in beautiful Vero Beach FL Click here for more information or Ask Captain Chris 772-205-1859